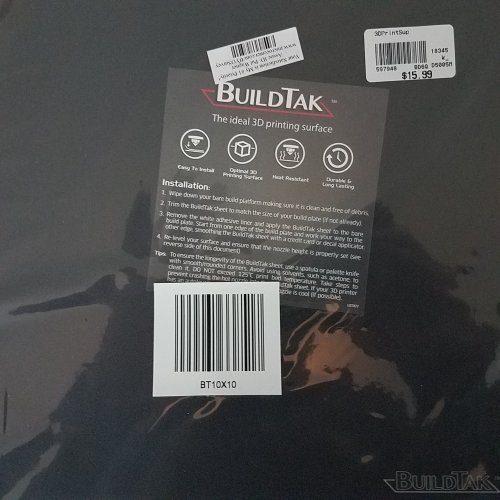
BuildTak Bed Cover
Forums:
Revised Note: Jan 03 2019..
OMG, could I really be so stupid? So it turns out there were two white backing sheets... (in the back of my mind I was thinking this all along) I removed the cover which I had tacked down with adhesive (which actually was working btw) to see if possibly there was a second backing on the BuildTak. I quickly realized that the second white covering came off. I am seriously thinking that I need to get more sleep or something. I pulled off the backing and re-seated the sheet and all is well. I will probably need to get some denatured alcohol to remove the residue from the glue. I am chalking that one off as just a closing chapter of how crappy 2018 was, which I am glad is over. Hopefully no more really dumb mistakes in the future.So as you read on, skip the parts where I mention adhesion, simply remove the actual backing. Frrrp...(pronounced frrrp)
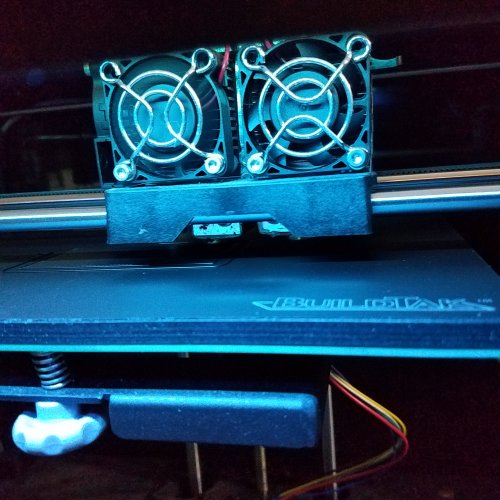
Today was the first replacement of the bed cover on my PowerSpec Ultra 3D.
After much review on the internet, I realized that MicroCenter carries these, so a mad dash to the store was in order.
Looking at both the Polymide sheets in packs of four and the BuildTak sheets in packs of one, I bought both.
The money saved in gas for another trip to the store would offset the additional spending
Installation
I opted for the BuildTak as my first choice. Much easier to install (so I thought) and a thicker pad above the original surface.I pulled off the old polymide that came on the original build surface and it came off quite easily.
Cutting the BuildTak
Next, I cut the new BuildTak sheet to fit my bed. I have a small Fiskars sheet cutter (shown) which worked excellent for cutting the BuildTak and probably worth the minimal price if you don't have one.
It has rulers on the side (or mark from the bed) and you simply slide the small sliding blade to cut the material, it cuts a very straight line.. perfect fit.
Mounting
Now, in theory, pull off the backing and adhere to the original build plate did not sound too difficult. Since I have applied vinyl lettering I figured this would not be too much of a challenge.Now if the adhesive backing actually stuck to the surface it may have been ok, but there was absolutely NO adhesion.. well maybe similar to spitting on the back of it. (*See note above!..frrrp)
I took the bed up to 100 degrees figuring maybe it needed a kick start. The heat just lifted it up further until it was arched across the build plate.
Now possibly I just got a bad batch of adhesive backing but it was pretty lame.
In comes my Elmer's spray adhesive to the rescue.
I removed the BuildTak and placed it upside down on a magazine. The trick to the spray glue is to insure it is coming out in just a light mist. If it globs you are done for.
I was able to mist the backing ever so slightly and then put the BuildTak back on. A nice adhesive and everything set well. No bubbles, no creases, etc.
First Print
So I figured my first print would be PLA. It worked at one time with this printer.Before doing anything, I did a full bed alignment and I did it three times. Being a 3 corner adjustment, raising one corner could literally raise both of the others.
I used the backing from the BuildTak as my adjustment sheet. On each corner I waited for resistance and then backed it off ever so slightly.
The first PLA attempt the print basically slid off. I did an alcahol wipe and turned the bed on to 60.
Things seemed to be improving and still no additional adhesive on the build plate required.
 I believe it is just dialing in the exact temp on both the plate and the extruders and will post the one that I find works the best.
An interesting thing I did learn was that there was a time when they switched manufactures, so the filament temp on the box was incorrect.
Seriously?
This could have been my problem all along, though I did keep trying different temps anyway.
This makes me somewhat doubt Inload Fillaments.
My first print that held came out very nice.. well except curling on the corners. Again, still working through the heat settings.
I liked the satin like texture of the buildTak but wondering if it will every produce a glossy finish like the polyimide tape.

More Prints
I am trying with PLA now and all doors closed, top cover on, bed 90, extruder at 230.Only a few hunder more spools of black and I may get one to print correctly.
As I have mentioned before, it is not quite an exact science..
As I always say with 3D Printing: "What printed great yesterday may never print the same way.. ever again.."
:)
PowerSpec Ultra 3D Bed
8.9 in (226.06mm)
5.7 in (144.78mm)
5.9 in (149.86mm)
5.7 in (144.78mm)
5.9 in (149.86mm)
- Log in to post comments